Clean Your iPhone’s Camera Lens
If your iPhone’s camera lens is smudged, it will impact the quality of your photos. Take a few seconds to polish it
7 Steps to Get Your Mac Ready to Sell or Pass on
I have often said that trading up your Mac can be the best way to stay on at least the trailing edge of technology. So much of your life and personal information are on your Mac that you want to make very sure that when you do sell it or pass it on to a family member or friend that you so not pass on your credit card numbers and little black book.
Apple makes it easy to get your Mac ready and here are 7 steps you should take:
A friend's slogan for all his emails was "may you have 1000 backups and never need one" and so true. Too many times we have customers who have lost vital data that could have been avoided by simply having backups. There are many ways to backup. You can use a network attached drive such as Time Capsule, you can simply have a backup drive that you periodically backup to, you can use iCloud for much of your vital data or other on-line backup services. The bottom line is, even though you are completely comfortable with migrating. your data, BACK IT UP FIRST!
2) Sign out of iTunes (for Mohave or earlier)
If you're using macOS Mojave or earlier, open iTunes. From the menu bar at the top of the screen or iTunes window, choose Account > Authorizations > Deauthorize This Computer. Then enter your Apple ID and password and click Deauthorize.
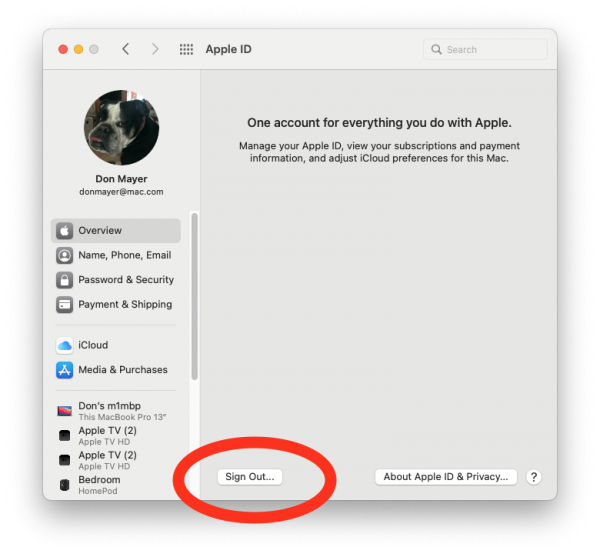
3) Sign Out of iCloud
If you're using macOS Catalina or later, choose Apple menu > System Preferences, then click Apple ID. Select Overview in the sidebar, then click Sign Out.
If you're using macOS Mojave or earlier, choose Apple menu > System Preferences, click iCloud, then click Sign Out.
You will be asked whether to keep a copy of your iCloud data on this Mac. You can click Keep a Copy, because you're erasing your Mac later. Your iCloud data remains in iCloud and on any other devices that are signed in to iCloud with your Apple ID.
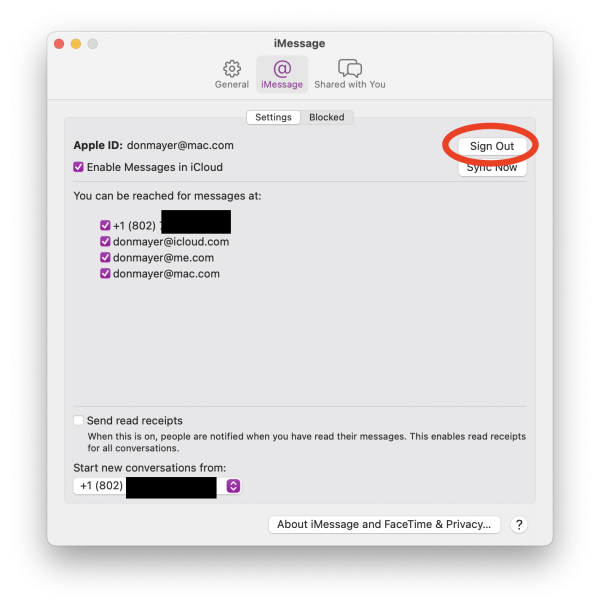
4) Sign Out of Messages
If you're using OS X Mountain Lion or later, open the Messages app, then choose Messages > Preferences from the menu bar. Click iMessage, then click Sign Out.
5) Reset the NVRAM
Okay this one takes some manual dexterity. Shut down your Mac, then turn it on and immediately press and hold these four keys together: Option, Command, P, and R. Release the keys after about 20 seconds. This clears user settings from memory and restores certain security features that might have been altered.
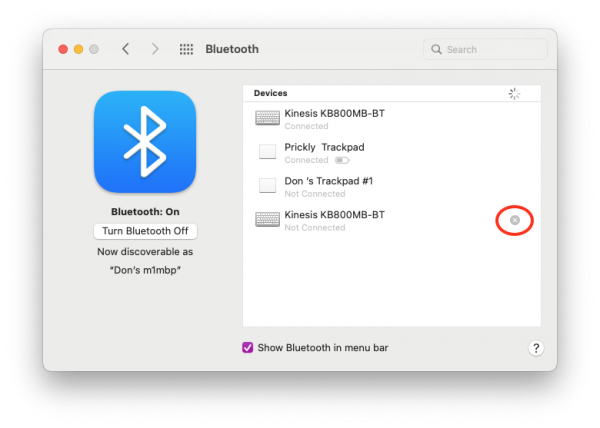
6) Unpair Bluetooth devices that you’re keeping
This is especially true if you are handing off your Mac to a child or someone in your household. If your Mac is paired with a Bluetooth keyboard, mouse, trackpad, or other Bluetooth device that you plan to keep, you can unpair it. This prevents accidental input when the Mac and device have separate owners but remain in Bluetooth range of each other.
To unpair a Bluetooth device, choose Apple menu > System Preferences, then click Bluetooth. Move your pointer over the device that you want to unpair, then click the remove (x) button next to the device name.
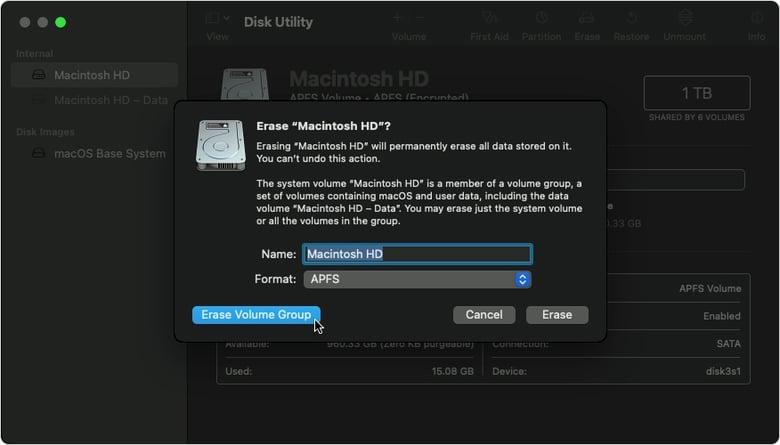
7) Erase your hard drive and reinstall macOS
You DID remember step one, right? Make a backup!
The best way to restore your Mac to factory settings is to erase your hard drive and reinstall macOS. To do this use Disk Utility.

Now that you have your old Mac ready to sell, surf on over to Small Dog Electronics.
If your iPhone’s camera lens is smudged, it will impact the quality of your photos. Take a few seconds to polish it
Are you upgrading to a new iPhone 16? It’s exciting. Follow these instructions when setting up your new iPhone to avoid causing yourself headaches.
The built-in Magnifier app on the iPhone and iPad is a godsend when trying to make out a tiny serial number or anything else that’s too small to read...